Updating Integra with the most recent QuickBooks data
Step 1: Integra/QuickBooks sync
- Open a browser and enter https://integra.insperity.com/Dashboard/Main. Enter your credentials and click Log In.
- Click Sign In
- Do you have new employees this period? Ensure the new employees are added to QuickBooks then sync to Integra and map the employee to the Insperity employee id
- Did you add new/edit accounts to QuickBooks that you will use with this export? Ensure you sync in order for Integra to pick up these new accounts.
- Sync Integra with the latest account and employee information from QuickBooks by opening your QuickBooks Desktop.
- Navigate to File then Update Web Services

.
- Check the Integra checkbox and then Update Selected
- If you work with multiple QuickBooks files make sure the correct file is open before you run each sync.

Importing Insperity payroll report for Integra
Step 2: Acquire the Integra XML Import file
Open a browser and enter https://portal.insperity.com/. Enter your credentials and click Log In.
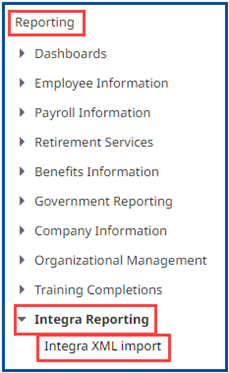
Access the Integra XML Import
- Select the Reporting tab in the left-hand menu
- Select the Integra Reporting tab
- Select the Integra XML import
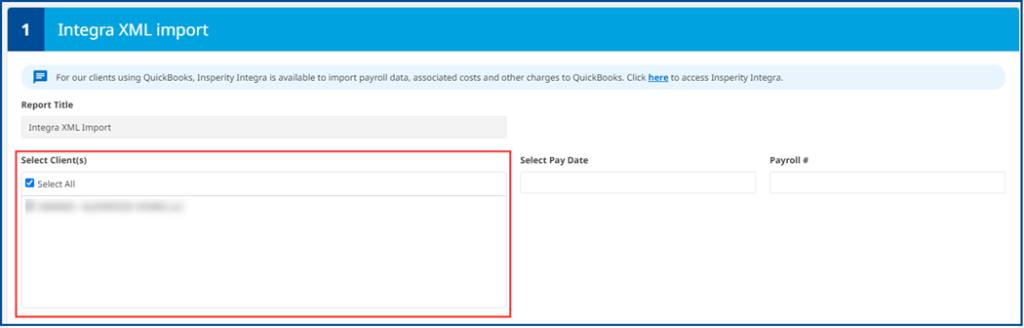
Select Client ID
Note: If you have multiple client IDs, you will only be able to run one client ID at a time.
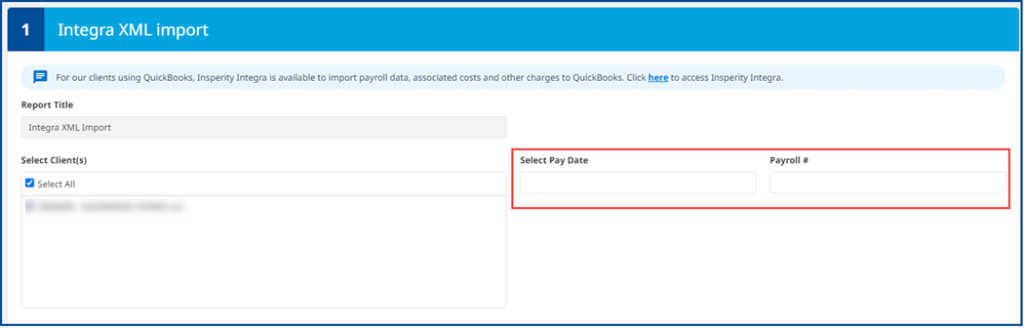
Select the Pay Date and Payroll #
If you do not know the pay date or payroll number, please run the invoice detail report.
Run Report
The payroll report will download automatically into your Downloads folder.

Step 3: Integra
Open a browser and enter https://integra.insperity.com/Dashboard/Main. Enter your credentials and click Log In.
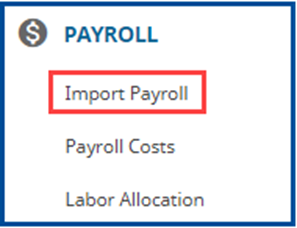
Import Payroll into Integra
- Under the Payroll area click Import Payroll in the left-hand menu.
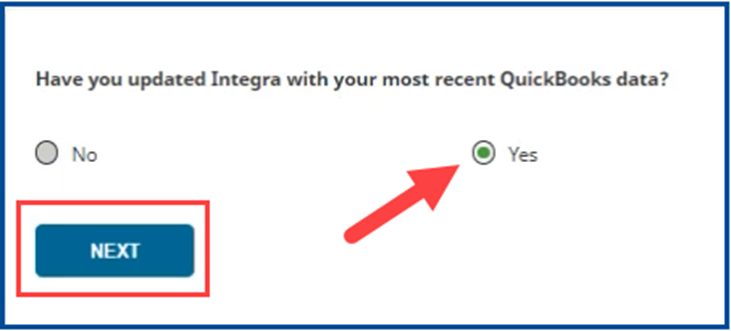
- Select Yes if you’ve updated with your most recent QuickBooks data.
- Click Next
- Before uploading XML file, please verify on the top left that the pay period dates correspond with the dates on the XML file.

- Click the Upload XML button. A new pop-up window will display, navigate to where the previously downloaded XML file is.

- After the import is successful, please click on view payroll. If the import is unsuccessful, please correct any errors and re-import.
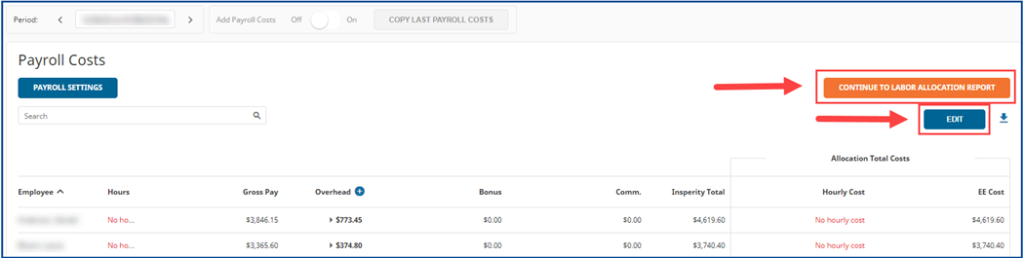
Review payroll costs
- You always want to review the uploaded payroll costs before moving forward to the Labor Allocation step.
- Click Edit if changes are needed
- Click Continue to Labor Allocation Report to continue
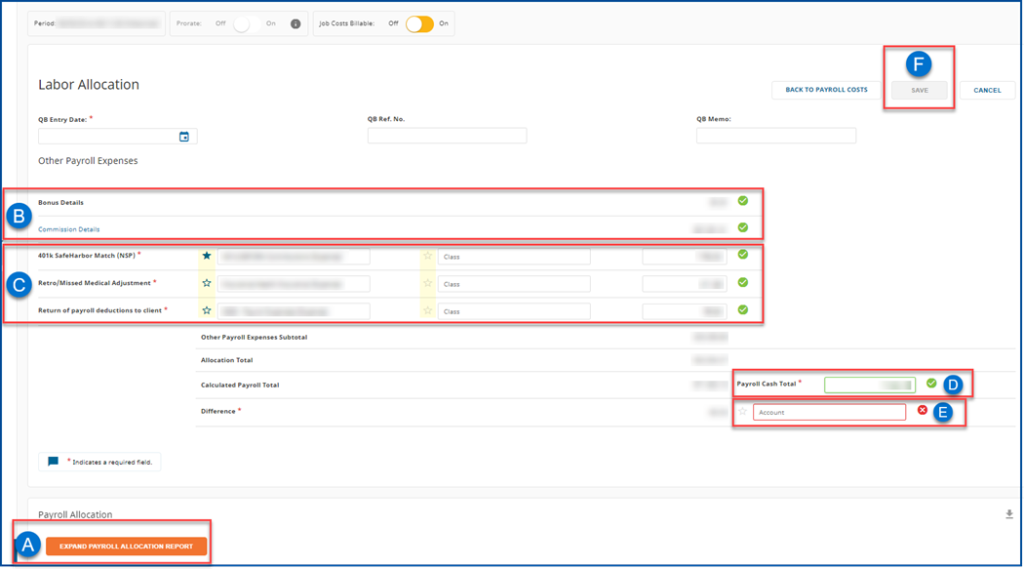
Labor allocation review
- Confirm QuickBooks bill fields
- Click Expand Payroll Allocation Report for further review
- Confirm bonus and commission (if any)
- Confirm and map or remove additional charges or credits from the Insperity bill (if any).
- To save future mappings please click on the star to the left of the account name.
- Input the Payroll Cash Total (total amount due to Insperity)
- Confirm and map the Difference (if any)
- Select Save then click Export to QuickBooks