
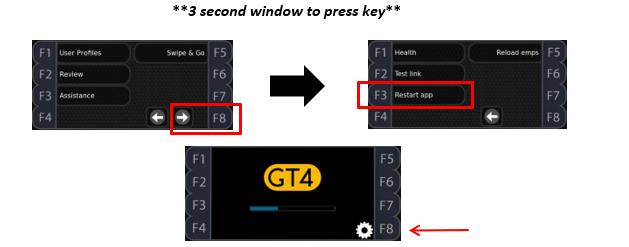
Enter the clock’s Supervisor menu. From the supervisor menu press the Right Arrow button and then Restart App(F3). Press Yes to confirm. You then see the message Exiting Application, Please Wait. When you see a loading bar with a Cog Icon at the bottom right press the F8 key.
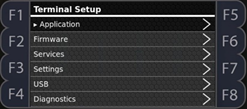
After a short wait screen you will be asked to enter a PIN number. The default PIN is 1905. Once keyed in press either OK or the checkmark button. You are now in the ‘Terminal’ menu.
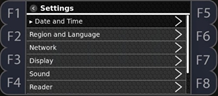
Press down arrow and highlight the ‘Settings’ item and press the checkmark button.
Once in the ‘Settings’ menu press down arrow and highlight ‘Network’, press the checkmark button.
Scroll down and highlight ‘DHCP’ and press the checkmark button. You should then see the current network information appear in the display.
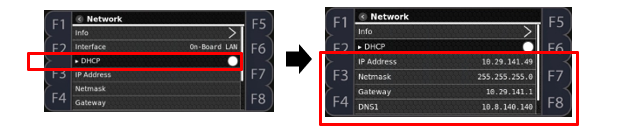
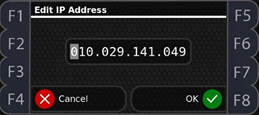
Scroll down to IP Address and press the checkmark button. You can now enter in the static IP address desired for the device. Press OK when fully entered. Continue down the network IP entries and change all entries to work with the connected network.
Once network information is entered, press either the X button or the left arrow button. You will be asked to Apply Network Settings? Confirm Yes and you will be taken back to the ‘Settings’ menu. Press the X button several times to exit from the ‘Terminal’ menu. The clock will now reboot into the clock application with the specified network settings.
