
Client User Activation
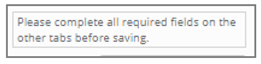
When you are ready to activate a Client User to give them access to the system, navigate to Security > Client Users. Before you start, read the important message on the screen.
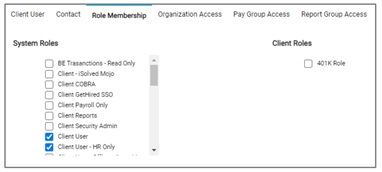
There are eight tabs across the top of the screen. Each tab must be completed (if applicable) prior to saving.
To get started, follow the process below:
1. Click on the Add New icon.
2. Username: Can be any unique name (not email address) to be used as the Username upon sign in.
3. Email: Enter the user’s email address.
4. Role Membership: Add any System-level roles that will give the user access to the screens that are appropriate to that user’s role in the company. Multiple roles can be added. Additional roles can be added at any time. Clients must Refresh to see the new role (screen access).
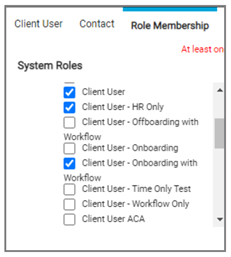
If a Client User Role is set up for the client under Security > Client Roles, the options will appear for selection under Role Membership. The role is coming from a client-level table.
5. Organization Access: This screen is optional. If a Client user only has access to one Organization, select the Organization Level. Once selected, click all boxes of that Organization that apply. Remember, this limits the employee’s access, and they may not be able to process payroll if multiple organizations levels are in one Pay Group.
6. Pay Group Access: At least one Pay Group or Legal Company must be selected (multiple selections are allowed).
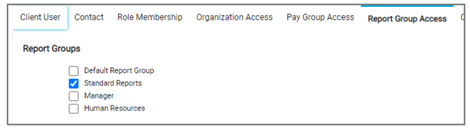
7. Report Group Access: Select all that apply:
- Default Report Group: This may be Report Writer reports.
- Standard Reports: These are all payroll related reports. Note: Other reports can be added to this group by the Service Bureau under Scheduled Report Options.
- Other Report Groups: If other Report Groups are created, they will be listed here for selection. Reports for special groups are added by the Service Bureau under Report Groups.
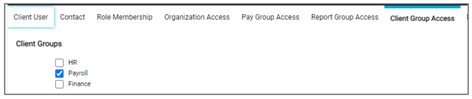
8. Client Group: Select all that apply. If the Client user is the recipient or approver of a change made through Employee Self-Service, select all groups the Client User belongs to. Note: Client Groups are created under Workflow > Client Groups.
9. Restricted Field Access: You can restrict the Client user from viewing the following three items:
- SSN
- Bank Account Numbers
- Salary
The default is “Not Restricted,” but these fields can be:
- Restricted with Mask
- Restricted without Mask
Note: Be careful when restricting salary, since it will not allow the Client user access to any screen or report where salary appears or could be calculated. This includes Payroll Entry.
10. Contact: Use the drop-down menu to select from the existing contacts on the client’s account, or use New Contact and enter the following information:
- First Name
- Last Name
- Title (optional)
- Authorization Code (any alpha or numeric value. There is a 10-digit limit)
- Update Birth Date (optional)
- Profile Picture (optional)
- Phone Numbers (optional)
- Type of Contact (optional)
- Notes (optional)
11. Click on the Save icon.
This step will send an email to the Client user to authenticate. The Client User has 72 hours to log in. If the 72-hour window is missed, you must delete the Client user and complete the setup steps above again.
Important
The Authorization Code will not be in the authentication email sent to the Client user. You must communicate the code to the Client user separately.
Client Users Updates
1. If a Client user locks themselves out of the system, navigate to Security > Client Users. The “Account Locked” option will be checked. Uncheck the box and click on Save. The Client user must change their login password and will be allowed to log in again.
2. To delete or stop access to the system by the Client user, click on the “Account Disabled” option and click on Save. You may also delete the account.
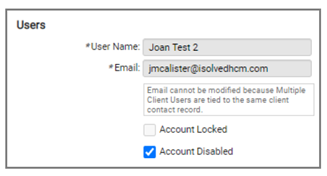
Note: See the note under Account Disabled. You are not able to disable an account until the authentication process by the user is complete. This will automatically remain checked until the authentication is completed.