Step 1: Accessing Integra
Open a browser and enter https://integra.insperity.com/Dashboard/Main. Enter your credentials and click Log In.
Step 2: Syncing QuickBooks with the latest data
Note: This step is required if employee records are being tracked in QuickBooks.
QuickBooks Online
- In Integra, hover over the two circular arrows on the top right-hand corner.
- Select Update Now (this will be highlighted in orange).
QuickBooks Desktop
- Open your QuickBooks Desktop application.
- Access the Web Connector.
- Select the account synced to Integra.
- Select Update Selected.
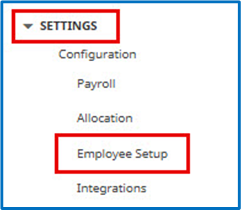
Step 3: Navigate to the Employees List
- Under the Settings area, select the Configuration tab in the left-hand menu.
- Click Employee Setup.
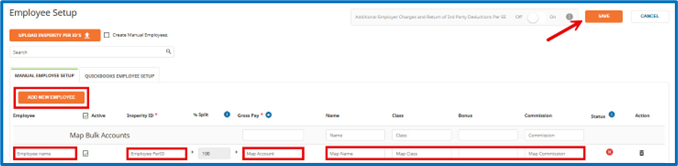
Step 4: Adding and mapping new employees
QuickBooks Employees Setup tab
Note: Employees must be mapped here if you’re importing time from Time and Attendance and/or timesheets from QuickBooks.
- New employees will import on this tab automatically if they have been added in QuickBooks and have been synced.
- Select EDIT on the top right-hand side.

- Map the new Employee(s) that has been added with the Insperity ID(s) and accounts necessary.
- Select SAVE on the top right-hand side.
- Before saving, confirm there’s not a red X in the Status column. If so, double-check both employee tabs and resolve the red-boxed errors.

Manual Employee Setup tab
- Select EDIT on the top right-hand side.

- Select ADD NEW EMPLOYEE.

- Map the Employee(s) that has been added with the employee’s name, Insperity ID(s), and accounts necessary.
- Before saving, confirm there’s not a red X in the Status column. If so, double-check both employee tabs and resolve the red-boxed error.
- Select SAVE on the top right-hand side.