Step 1: Accessing Integra
Open a browser and enter https://integra.insperity.com/Dashboard/Main. Enter your credentials and click Log In.
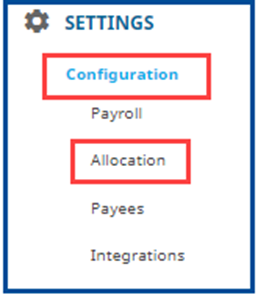
Step 2: Navigate to the Allocation Settings
- Under the Settings area
- Select Configuration
- Click Allocation
Step 3: Understanding Allocation preferences
Payroll Allocation Method
Here you can change the Entry Method (report type) based on the information allowed by your payroll team.
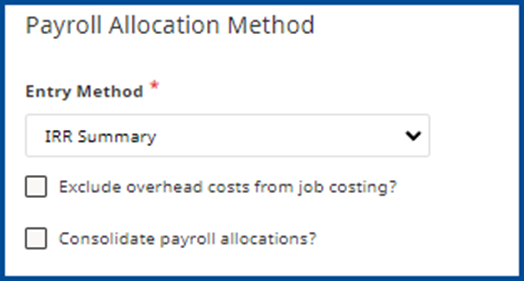
- Exclude overhead costs from job costing if checked will not apply overhead costs to timekeeping.
- Consolidate payroll allocations if checked all payroll costs will be combined with like accounts based on payee mapping or from time sheet data.
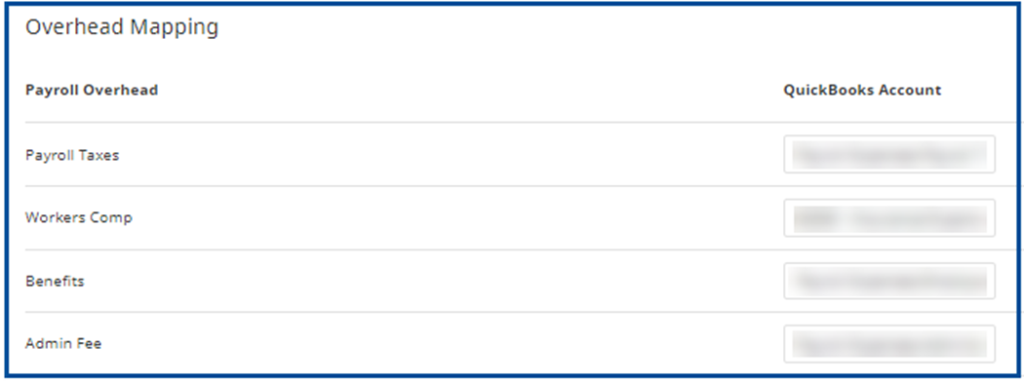
Overhead Mapping
Depending on your report type, you will receive a breakout of each employee’s non-labor-related expenses (overhead payroll costs). Here, you will be able to map/remap the accounts they allocate to before exporting to your QuickBooks.
Additional Charge and Credit Mapping
If you receive any credited charges on your payroll, the account they will allocate to can be set in this section. This amount is typically in a lump sum and not allocated per employee. Note: Your selection can be saved for future use by selecting the star icon on the labor allocation page.

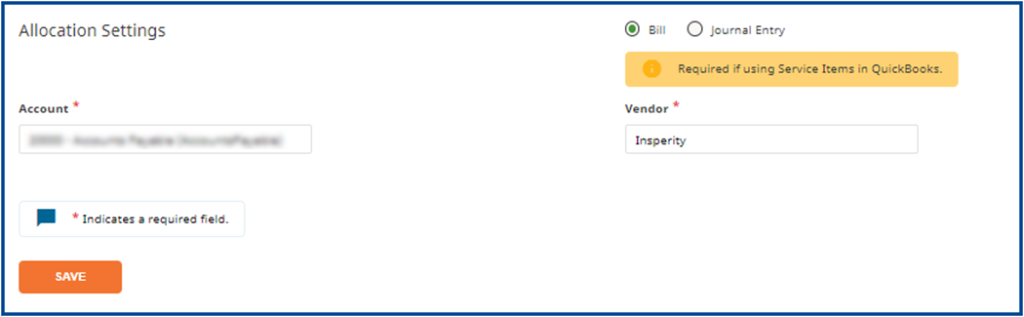
Allocation Settings
Your final settings in the allocation preferences area will allow you to select your desired export type (Bill vs Journal Entry) depending on your QuickBooks usage. Note: If you are using service items and/or tracking time, the Bill option will need to be used. Below, you can select the desired Account and the Vendor.