If the incorrect XML file was imported into the wrong pay period it cannot be deleted but it can be overwritten with a new file. Please obtain the correct XML file from Insperity Premier and import it into the correct pay period to overwrite the information in Integra. Any data already exported to QuickBooks will need to be manually deleted in QuickBooks.
Step 1: Access Integra
Open a browser and enter https://integra.insperity.com/Dashboard/Main. Enter your credentials and click Log In.
Step 2: Import the correct payroll file into Integra
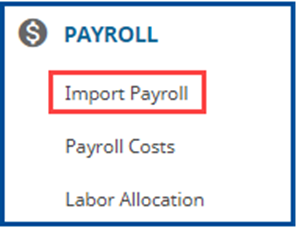
- Under the PAYROLL area click Import Payroll in the left-hand menu.
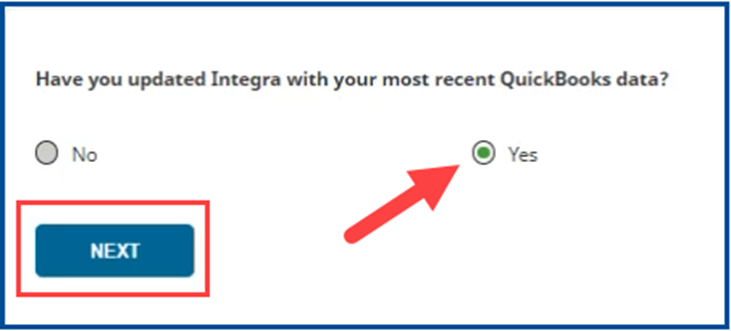
- Select Yes if you’ve updated Integra with your most recent QuickBooks data.
- Click NEXT.
- Before uploading XML file, please verify on the top left that the pay period dates correspond with the dates on the XML file.

- Click the UPLOAD XML button. A new pop-up window will display. Navigate to where the previously downloaded XML file is.
- After selecting the XML file, a new pop-up window will display with a warning saying “There is already a payroll exported for this pay period. Do you want to overwrite the latest payroll or create a new one?”
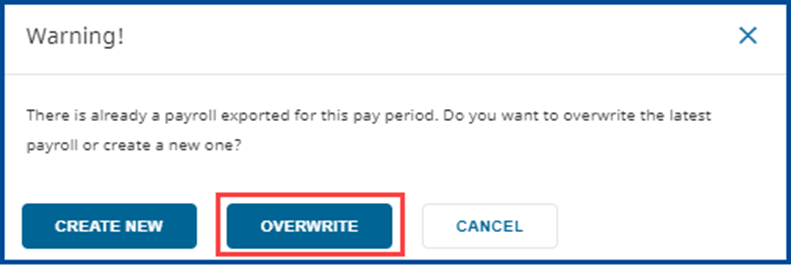
- Select OVERWRITE.
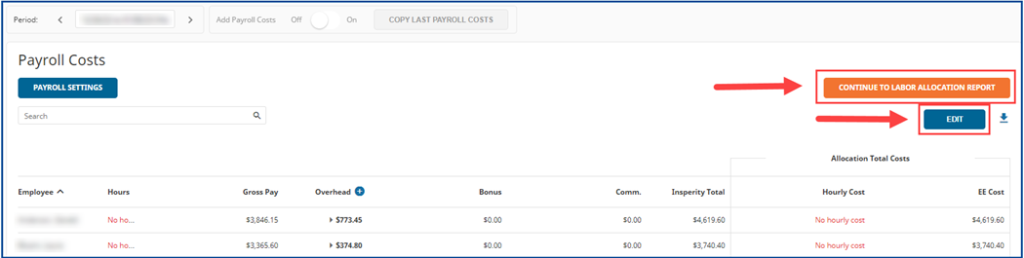
Step 3: Review you payroll costs
- You always want to review the uploaded payroll costs before moving forward to the Labor Allocation step.
- Click EDIT if changes are needed.
- Click CONTINUE TO LABOR ALLOCATION REPORT to continue.
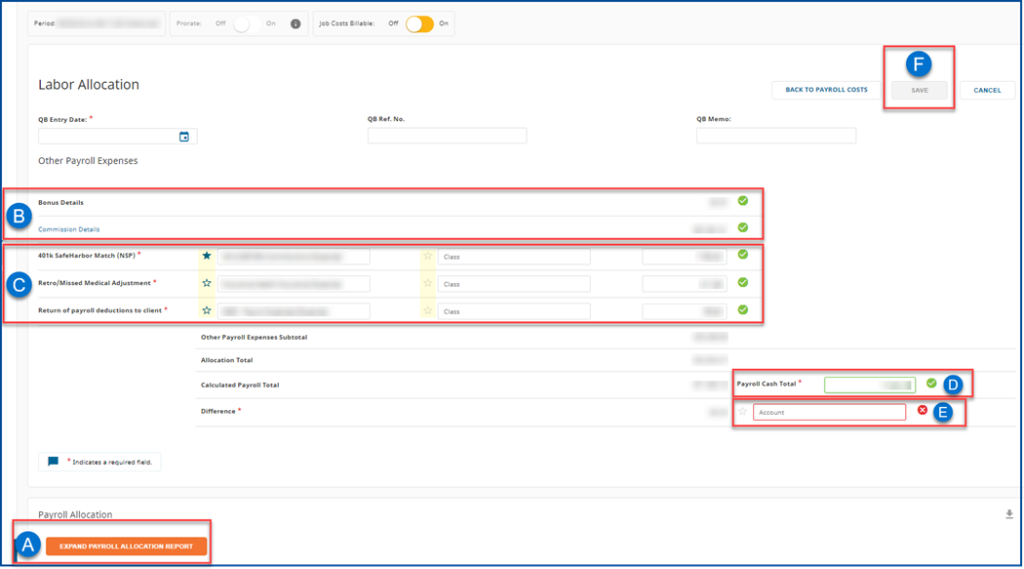
Step 4: Review the labor allocation
- Confirm QuickBooks bill fields
- Click EXPAND PAYROLL ALLOCATION REPORT for further review.
- Confirm bonus and commission (if any).
- Confirm and map or remove additional charges or credits from the Insperity bill (if any).
- To save future mappings please click on the star to the left of the account name.
- Input the Payroll Cash Total (total amount due to Insperity).
- Confirm and map the Difference (if any).
- Select SAVE then click Export to QuickBooks.