
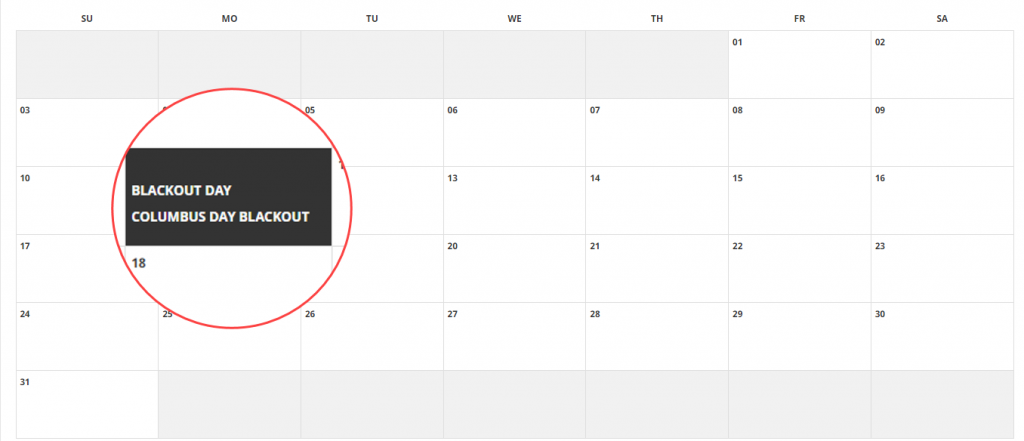
The purpose of a blackout date is to restrict employees from using a certain pay type on a certain date.
For example, you may wish to restrict the use of PTO on a company holiday to prevent Holiday + PTO records on the same date. Employees can view blackout dates via the Daily Procedures > Schedules > Time Off Calendar. Administrators can manage blackout dates via the Company Setup > Requests Setup > Blackout Dates page.
If you do not have access to Blackout Dates in Company Setup, please contact Time and Attendance Support.
Adding a blackout date
- Navigate to Company Setup > Requests Setup > Blackout Dates
- If this is your first time entering a blackout date, the page will default to the ADD NEW form. If you’ve entered blackout dates previously, you will need to click the ADD button to open the ADD NEW form.
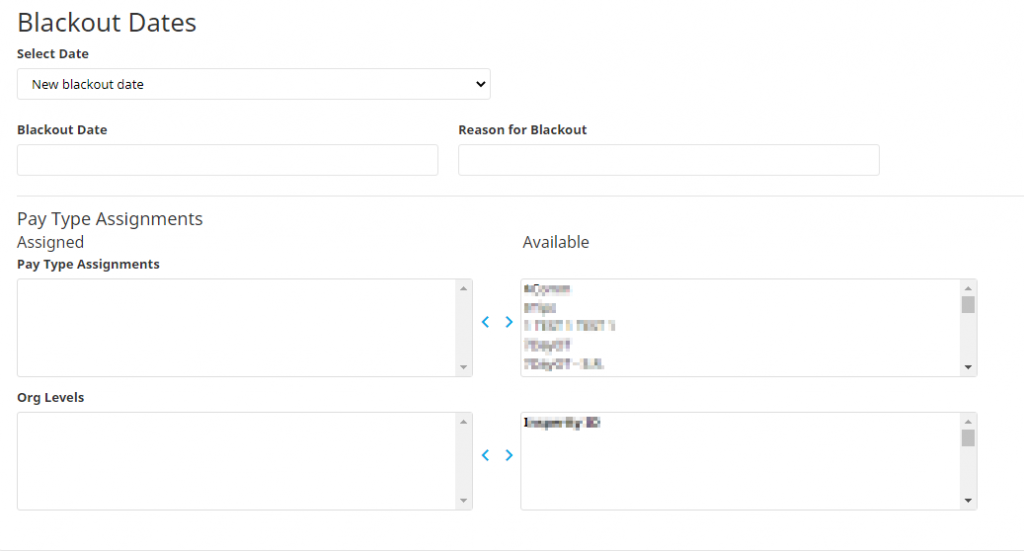
- In the Blackout Date field, select the date of the blackout
- In the Reason for Blackout field, enter a description of why the blackout is being added (e.g. Mandatory Work Day, Christmas Holiday [DATE], etc.)
- Select the pay types you wish to restrict on that date from the Available box on the right and move them to the Assigned box on the left
- Select the home organization levels you wish to restrict from using those selected pay types from the Available box on the right and move them to the Assigned box on the left
- Click the SAVE button
**Like holidays, blackout dates will need to be generated each year as they are tied to a specific calendar date/year.**
Editing an existing blackout date
- Navigate to Company Setup > Requests Setup > Blackout Dates
- Select the blackout date you wish to edit from the Select Date drop-down menu

- Make any necessary changes:
- Blackout Date – the date of the blackout
- Reason for Blackout – a description of why the blackout is being added (e.g. Mandatory Work Day, Christmas Holiday [DATE], etc.)
- Pay Type Assignments – the pay types you wish to restrict on that date
- Org Levels – the home organization levels you wish to restrict from using those selected pay types
- Click the SAVE button
Deleting a blackout date
- Navigate to Company Setup > Requests Setup > Blackout Dates
- Select the blackout date you wish to edit from the Select Date drop-down menu

- Click the DELETE button
- A confirmation box will appear, asking if you’re certain you want to permanently delete this blackout date. If so, click the OK button.