
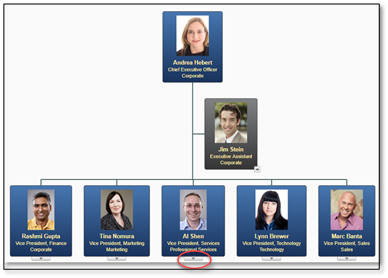
Organizational chart basics
Upon logging into Insperity Organizational Planning, your company’s organizational chart will display in the center of your screen. Displayed on each box, you will be able to see basic information about the employee. Clicking on the up or down arrows allows you to move through the chart to see the next set of levels of employees.
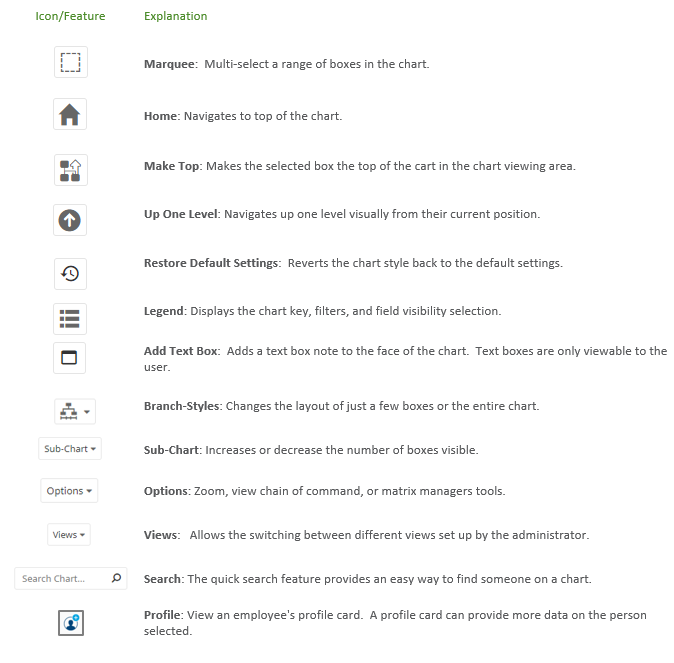
Tools for navigating and displaying your charts
At the top-right menu bar, you will find the following icons that allow you to change the look and feel of your organizational chart.

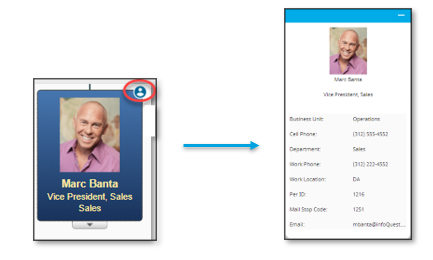
Seeing additional employee information with profile cards
When hovering over the top right of their box, each employee will have a profile icon. Clicking on the profile icon will open a window that has additional information about the employee.
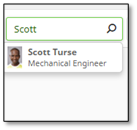
Finding employees with the quick search tool
The quick search feature is powerful and very easy to use. To use the search, click in the search box and begin typing the name or job title of the employee you would like to find in the chart.
As you type, the system predictively presents matches to your search. Simply click the one you want, and you’re taken instantly to their box on the chart.
Changing the layout using branch-styles
Branch-styles allow you to adjust the layout of your chart. You can apply styles across the displayed chart area, the entire chart, or a specific selection of boxes.
To change the style of the chart, use the Branch-Styles icon and select a style to apply to the chart.
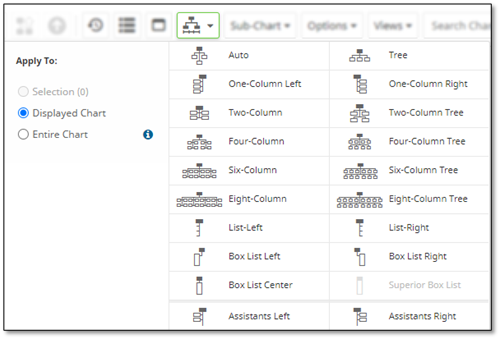
To the left, you can choose how to apply the new style; Selection (only those boxes highlighted), Displayed Chart (the boxes visible on the screen), or Entire Chart (all boxes on all levels).
To multi-select boxes, you can use the Marquee icon.

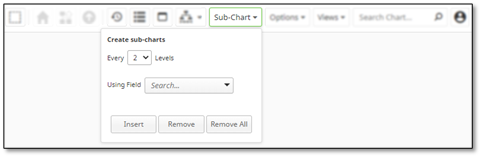
Viewing more or less boxes with sub-charting
Sub-charting will allow you to increase or decrease the number of levels of boxes on a page. You can change the number of levels displayed by clicking on the Sub-Chart icon and changing the number to the number of levels you would like to display.
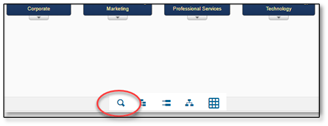
Using the Search Panel and Filters
To search the chart using keywords and filters, you can use the Search Panel feature and apply preset and custom filters. The filtered search results will display in a list view. To access the Search Panel, click the icon at the bottom of the page.
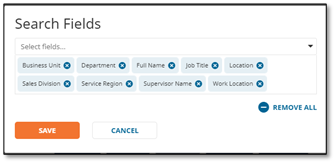
Setting the searchable displayed columns
The Search Panel will default to the column settings set up by the administrator. You can change the columns by going to Settings, Search Fields and add the fields you want to display.

Using the search box
To search the chart, begin typing your search criteria in the search field. Your results will display in a list view on the screen. Clicking the employee in the list will take you to the employee in the chart above.

Creating and using filters
To filter the search results, you can select one of the pre-defined filters set up by the administrator or create your own by selecting the filters icon.

The types of custom filers are Custom filters and My Filters.
- Custom Filter: Create a custom, one time use filter.
- My Filter: Creates a saved custom filter for later use.
To create a one-time use filter, select Custom:
In the first drop-down box, select the field that you want to use to limit your search. Next select the qualifying argument (equal to, is, is not…), then complete the qualifying condition.
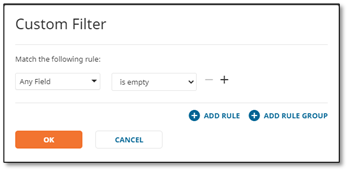
For example, if you want to search for only those employees whose titles contain Director, then the following field choices can be set to “Job Title” “Contains” “Director”.
To create a personal filter to save for future uses, select My Filter:
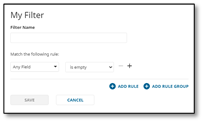
Name the filter in Filter Name.
In the first drop-down box, select the field that you want to use to limit your search. Next select the qualifying argument (equal to, is, is not…), then complete the qualifying condition.
Press Save when complete.
Exporting your search results
You can export your search results to excel by selecting the Export to Excel icon:
This will take you to a screen where you can configure the files you would like to export. You can include just the fields displayed on-screen or you can add all the fields for which you are granted permission to access.