
Introduction
The Units page in Time and Attendance is used to track numbers of units of a specific item or items across time. Often, a dollar or hour per unit amount is established, which in turn automatically ties each unit record to a dollars or hours record.
Navigating to the Units Page
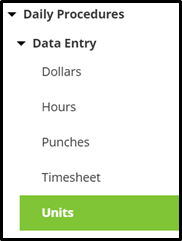
- In the Main Navigation menu, open the Daily Procedures folder.
- Open Data Entry subfolder.
- Click on the Units page.
Reviewing the Units Page
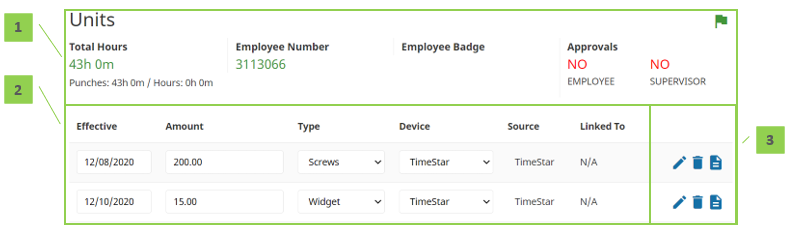
- Summary Bar
Total Hours – Total recorded time from the Punches and Hours pages
Employee Number – Assigned employee number
Badge Number – Employee’s badge number if hardware clocks are in use
Approvals – Status of employee and supervisor approvals - Units – Unit records for the elected employee. For definitions of each field, see the section titled “Units Detail Definitions.”
- Edit Column – Buttons that allow additional interaction with the units.
Units Detail Definitions
Below is a list of the fields in the order in which they may be seen on the main Units page or within the Detail View pop-up window when editing or adding a units record. Access to these fields is dependent on company setup and individual security.
Effective – Effective date of the units record
Unit Type – Type of units applied to the record
Amount – Number of units associated with the record
Device Number – Device from which the units record originated
Source Code – Source from which the units record originated
Comment – Comment (to be) associated with the units record
Organization Level – Organization level items assigned to the units record
Linked To – The hours or dollars record to which the units are linked
Editing a Units Record
With the appropriate security, any item that displays on the main portion of the Units page can be edited by selecting and overwriting the data within the appropriate field and clicking Save.
Additional units information can be edited using the following steps:
- Click the Edit button to on the record to be edited. The Detail View pop-up window opens.
- Adjust the field(s) as needed. At minimum, the Effective Date, Unit Type, and Amount fields must be completed.
- Click Save.
Deleting a Units Record
- Click the Delete button to the right of the units to be removed. A warning message opens to confirm the deletion of the record.
- Click OK.
Adding a Units Record
To add a single units record:
- Click the Add button, located at the bottom left of the page. The Detail View pop-up window opens.
- At minimum, the Effective Date, Unit Type, and Amount fields must be completed.
- Click Save.
Adding Many Units Records
To add many units records at once, it is best to use the Timesheet option.
- In the Main Navigation menu, open the Daily Procedures folder.
- Open Data Entry subfolder.
- Click on the Timesheet page.
- Use the drop down located on the second row of the Timesheet to select the worksheet to use. These are created and customized for each install, but will typically have a separate timesheet for units.
- Find the date of the units record, and fill in the applicable fields.
- To add an additional record to the same day, use the Plus-Add Units button located on the units block.
- For more detailed information about using the Timesheet, see the “Timesheet” User Guide.
- Click Save.