
The Timesheet page in Time and Attendance is used to add punches, hours, dollars, mileage, and/or units across time in bulk. If Timesheets are being used for more than one type of tracking item, is possible to have access to more than one in a single Timesheet, or have them spread out across different Timesheets.
For a video on recording punches on the Timesheet, see Recording Time Using the Punches Timesheet in the Time and Attendance Video Library.
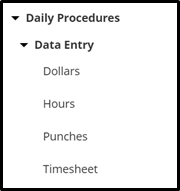
Navigating to the Timesheet Page
- In the Main Navigation menu, open the Daily Procedures folder.
- Open Data Entry subfolder.
- Click on the Timesheet page.
Reviewing the Timesheet Page
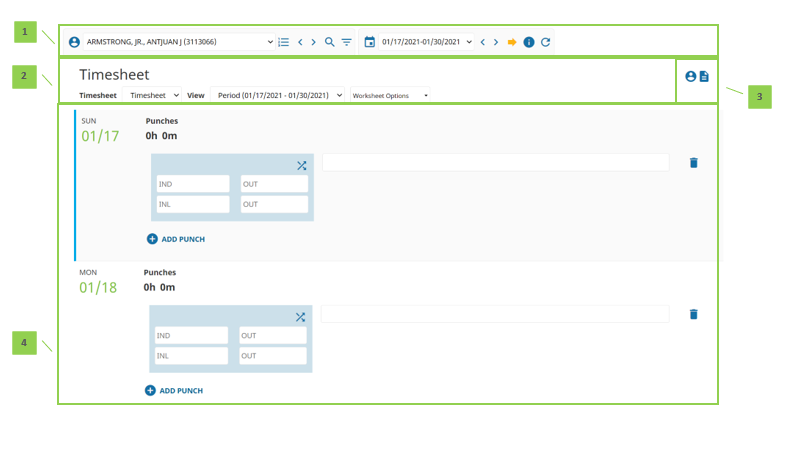
- Employee Toolbar – Select the employee and pay period to display in the Timesheet
- For additional information on the employee toolbar, see the “Employee Toolbar” section in the “Basic Navigation” User Guide.
- Timesheet Selection drop downs
- Timesheet (first drop down)– Type of Timesheet. Available Timesheets are dependent on company requirements.
- Period (second drop down) – Update the Timesheet to display a single week at a time
- Worksheet Options (third drop down) – Options to view labels on fields, allow shelves, and keep shelves open
- Additional Tools
- Employee Information – Opens a shelf containing at-a-glance employee information. Click the button a second time to close the shelf.
- Totals – Opens a shelf containing worksheet totals. Click the button a second time to close the shelf.
- Main Timesheet Information – Main section of the Timesheet containing the employee punches, hours, dollars, mileage, and/or units data
Adding a Record
To add a new record to the Timesheet, follow the steps below:
Choose the appropriate Timesheet from the Timesheet drop down.
Locate the row containing the date in which to apply the record.
Fill in the applicable fields. Available fields are dependent on the specific company requirements. For more detail on each option, refer to the Detail Definitions section of the User Guides as listed below:
To add an additional record to the same day, use the Plus button contained in the detail block adjacent to the date column.
To record an Organization Level Item transfer on a punch, follow the below steps:
- Click on the interlocking arrows button.
- Fill out the Transfer box with the time of the transfer, and the select the Organization Level Items from the Organization Level Items drop down(s).
- Fill out any additional fields as needed.
- Repeat for additional dates as needed.
- Click Save.
Editing a Record
To edit a record on the Timesheet, follow the steps below:
Choose the appropriate timesheet from the Timesheet drop down.
Locate the row containing the date in which to edit.
Edit the applicable fields. Available fields are dependent on specific company requirements. For more detail on each option, refer to the Detail Definitions section of the User Guides as listed below:
To add an additional record to the same day, use the Plus button contained in the detail block located adjacent to the date column.
To record an Organization Level Item transfer on a punch, follow the below steps:
Click on the interlocking arrows button.
- Fill out the Transfer box with the time of the transfer, and the select the Organization Level Items from the Organization Level Items drop down(s).
- Fill out any additional fields as needed.
- Once all dates and/or fields are edited as needed, click Save.
Deleting a Record
Use the following steps to delete a Timesheet record:
- Click the Delete button to the right of the record to be removed. The row to be deleted will be greyed out.
- Click Save.
Timesheet Templates
If similar information is entered in each time the Timesheet is used, a user may wish to create their own template with saved data that can be used for future entries, therefore shortening data entry time. For example, if a user often works from 8:00am – 5:00pm each week on Monday through Friday, a template may be created with that information to be used in future pay periods. Any variations to that data can then be easily altered as needed. To create a Timesheet template, follow the steps below:
- Choose the appropriate timesheet from the Timesheet drop down.
- Click the Create Template button.
- Enter the information to save to the template.
- Click the Save Template button.
- Click the Back to Timesheet button to return to the Timesheet page.
Click the Use Template button to apply the template that has been created. To edit the template, click the Edit Template button.