
This article is for adding a new employee in Time and Attendance. If you are a client of the Insperity® HR360 solution, employees are added and/or updated through Insperity Premier. Please contact your payroll specialist if you have any questions about how to make this update.
If you are a client of Insperity HR360 and the employee is a non-Insperity paid employee, follow the instructions below.
Rehiring
To rehire an employee, you must be in the last pay period in which the employee was active. If you are unsure of the pay period, first use the Diagnostics > Employee Search tool and select the employee.
With the employee selected and viewing the last pay period the employee was active in, select the Rehire button at the bottom of the Employee Profile screen. The following screen displays after the Rehire button is selected.
Select the Rehire Employee button at any time within the wizard to reactivate the employee. All required fields must be completed prior to reactivating the employee.
Select the Cancel/Exit (x) button to exit the wizard without saving any changes.
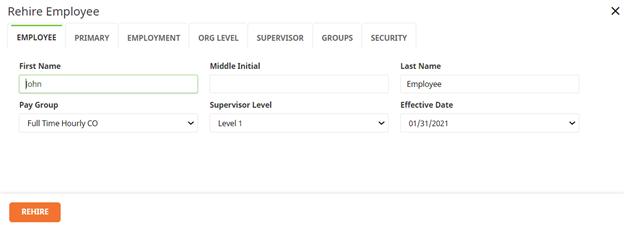
Employee
Click on the tabs on the top of the screen to enter the employee’s information:

All 4 fields on the first screen are required.
| Field Name | Description |
| Name | Employee Name |
| Pay Group | The pay group the employee is assigned, The pay group controls the calculation of all hours and punches within Time and Attendance |
| Supervisor Level | The level of supervisor the employee (i.e. employee, supervisor, manager, etc.) |
| Effective Date | This field should be the first day of the pay period in which the re-hire date belongs. **This field should not be the actual re-hire date as that date will be entered next |
When you have entered the required information, click on the Primary tab.
Primary
The following page will display:
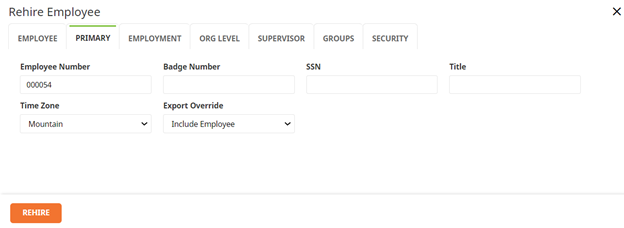
| Field Name | Description |
| Employee Number | Employee’s identification number within the company |
| Badge Number | Employee’s badge number |
| Social Security Number | The Employee’s social security number |
| Title | Employee’s job title |
| Time Zone | Employee’s time zone. The time zone defaults to the time zone set up for the company |
| Export Override | Whether or not the employee will be on the payroll export file |
When you have entered the required information, click on the Employment tab.
Employment
The following page will display
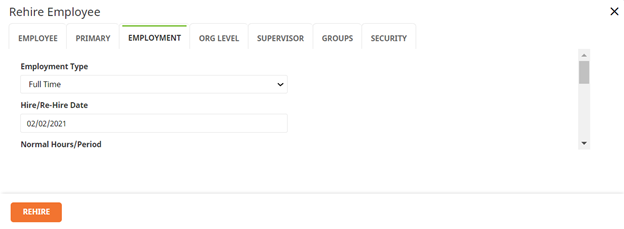
| Field Name | Description |
| Employment Type | Employee’s employment type (i.e. full time, part time, etc) |
| Re-Hire Date | Employee’s re-hire date |
| Normal Hours/Period | Is the amount of hours the employee works |
| Pay Status | Employee’s pay status (i.e. hourly, salary, etc) |
| Salary | Employee’s annual salary |
| Withholding | Employee’s withholdings |
| Work Shift | Employee’s shift code |
| Healthcare Group | Employee’s healthcare name |
| Pre-Tax | If there’s pre-tax or not |
| Work Country | Which country the employee works in |
| Work State | Which state the employee works in |
The employee’s active status will automatically be set to Active. You may enter any information you wish on this screen. Select Next and the following page will display:
Org Level
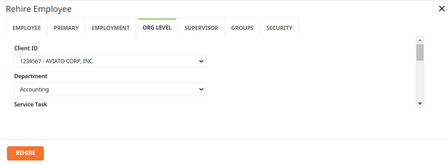
The organization levels set up for your company will be listed. Note that organization-level hierarchy is enforced, so assign organization level from the first level downward.
When you have selected the organization levels you wish to assign to the employee, select Next. The following page will display:
Supervisor
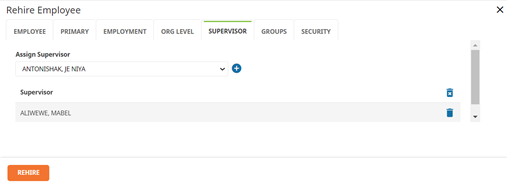
On this screen assign supervisor(s). Supervisors will be grouped by the supervisor level and listed alphabetically within each supervisor level. When you have completed supervisor assignments, select the Next button. The following page will display:
Groups
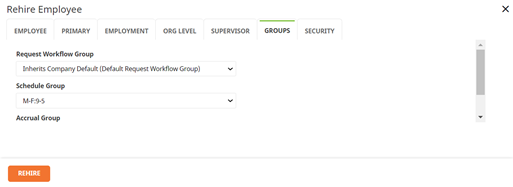
If your company utilizes schedules, you may select the schedule group, accrual group, and request workflow group. If your company utilizes allocations, select the employee’s earning group. If your company utilizes accruals, select the employee’s accrual group. When you have completed group assignments, select the Next button. The following page will display:
Security
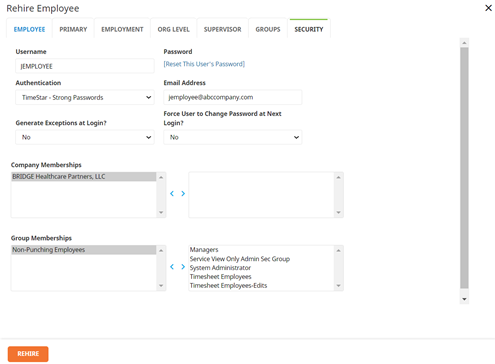
If an employee was previously a user of Time and Attendance, the user information will display on this tab. If the employee was not a user, it is suggested that the employee be added as a user via System – User Security or Global Maintenance – User since group assignments cannot be made from this screen.
When you have completed your entries, select the Rehire Employee button. If there are any sections you have not completed, a pop-up message will appear. An example of the message is below.
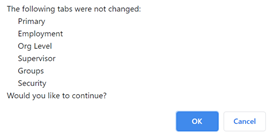
If you do not wish to enter the additional information listed in the message, select OK and the employee will be added to the system. To enter additional information before saving the employee, select “Cancel” and you will be returned to the employee wizard.