
Filters can be used as a means to view a specific set of employees. For example, if a user wants to access all employees that are part of a specific pay group, the user could create a filter. Filters are located in the employee toolbar.

When creating a filter using the filter option on the employee toolbar, the filter will be saved specifically for the user who created it.
Creating a simple filter
Filters that use the ‘Match All’ or ‘Match Any’ options are called simple filters. Simple filters do not contain comparisons between different criteria.
To create a simple filter, click the filter button from the employee toolbar.
The filter configuration window will appear.
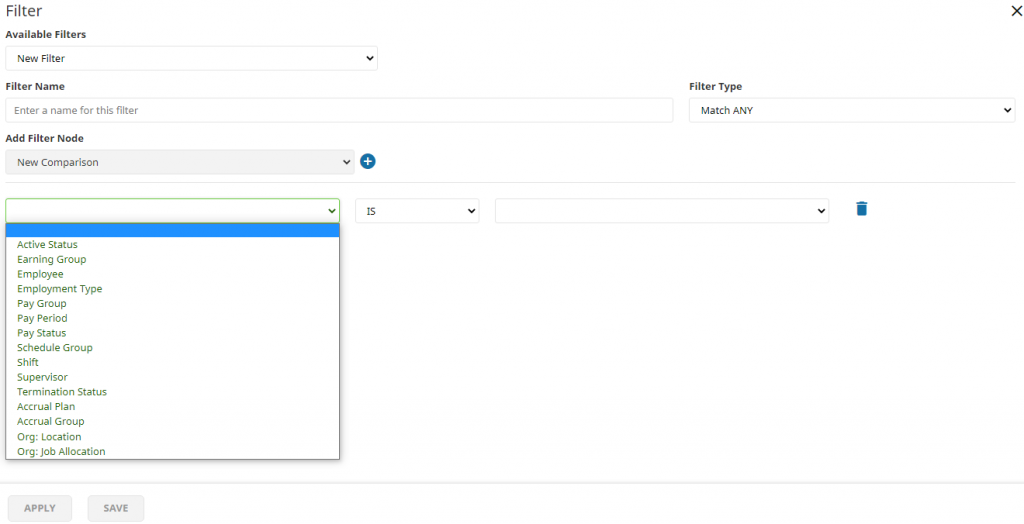
Filters must contain a name in order to be saved. If a filter is going to be saved, enter the filter’s name in the ‘Filter Name’ field.
For a simple filter choose a filter type of ‘Match ANY’ to display a list of employees that match any of the criteria selected. A ‘Match ALL’ filter type will display a list of employees that match the entire criterion selected.
Use the first drop-down menu to select the criteria to be used to filter the employee data. Use the second drop-down menu to limit further the value set in the first drop-down menu.
An example of a simple filter is Active Status IS NOT Terminated.

‘IN’ and ‘NOT IN’ are useful for comparisons that involve organization levels or pay groups so that multiple comparisons do not need to be created.
When ‘IN’ or ‘NOT IN’ are selected, the user is presented with more options via an additional entry screen. A number of items may be selected, and by clicking the Apply button, the comparison is created.
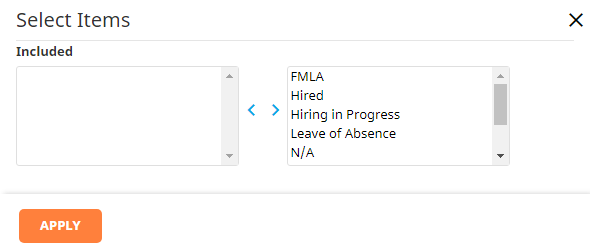
If the comparison is a ‘NOT IN’ or ‘IN’ statement, the pencil (edit) button will appear to update the items in the list. Comparisons may be deleted by clicking the trash (delete) button.

Creating complex filters
Complex filters give the user very robust filtering capabilities. A user may create a combination of AND/OR statements and combine saved filters to create comparisons.
To create a complex filter, select Complex from the Filter Type drop-down. Add comparisons using the same method used in simple filters.
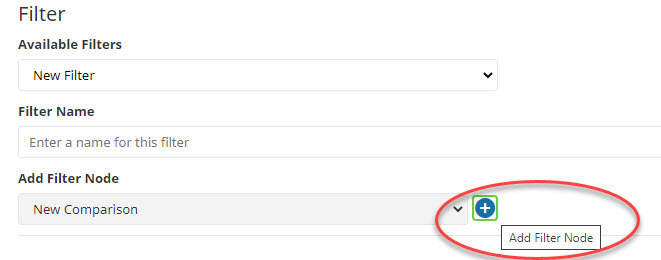
To assign multiple comparisons at once, click the “plus” button next to Apply Filter Node between comparisons.
For complex filters, the filter name must be defined before the filter can be applied. The Apply button will be grayed out until all of the components of the filter have been completed and the complex filter is named.
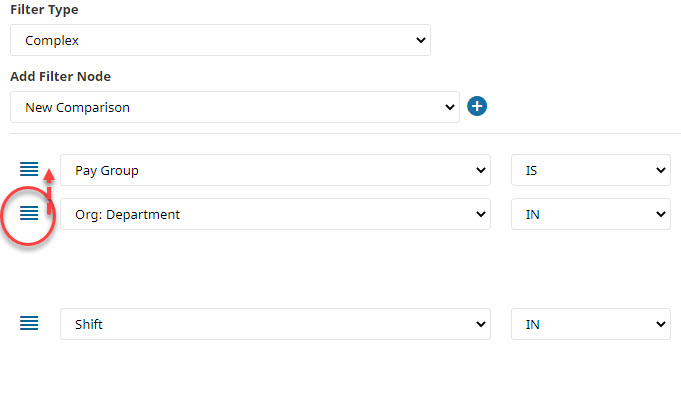
Below is an example of three comparisons to be used to create a complex filter. The user is looking for a list of employees that are paid hourly in any department and work first or second shift.
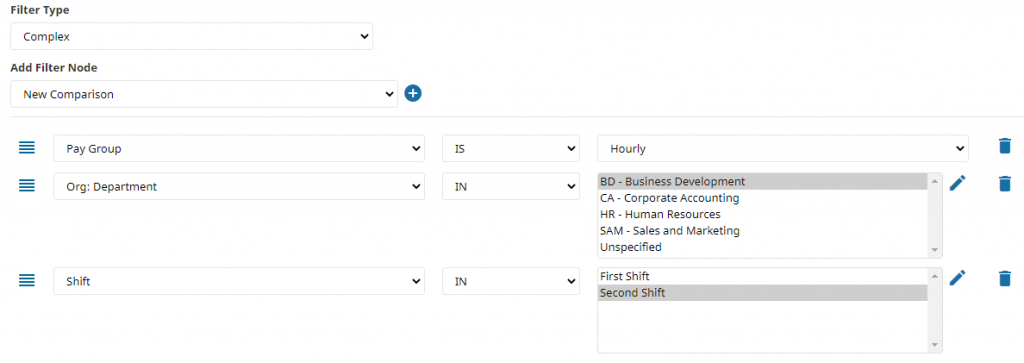
To further define the comparisons, click and drag the comparison via the bars icon of the second comparison to the top of the first.
Once the filter is named, use the drop-downs to select comparison values.

If the ‘OR’ drop-down is set to ‘AND’, then the word ‘EITHER’ will be changed to the word ‘BOTH.’
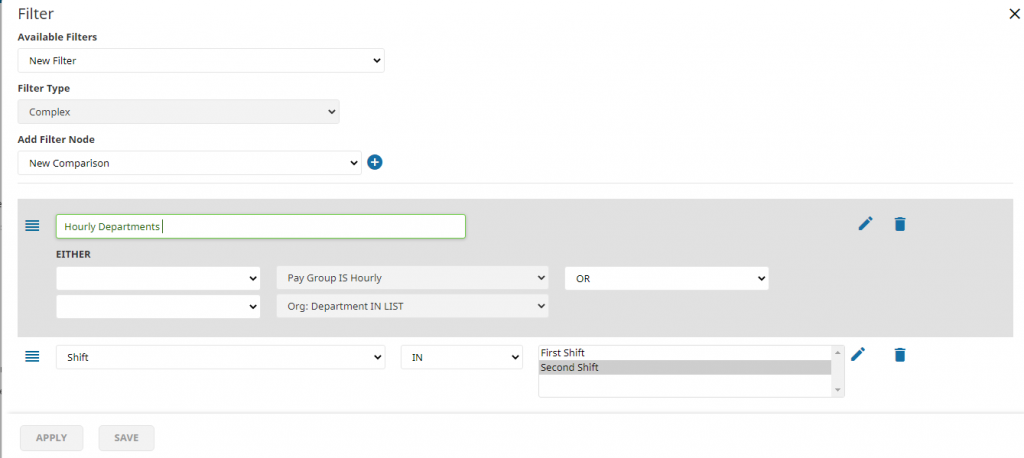
Name the first complex filter, then drag the second filter into the first and you will see the results below. The filter will select employees who are in pay group ‘Hourly’ and not in the list of departments defined on the previous screen.

This filter now applies to employees that are either in the Hourly pay group AND the listed departments OR the shifts listed.
Filters must be named in order to be saved. The user must click the Save button to save a filter. The user must click the Apply button to save the filter and apply the filter immediately.
Creating filters for user accounts
Pre-set, permanent filters can be created for employees to use, limiting the scope they can see in Time and Attendance.
When creating a filter for a user account other than the currently logged-in user, select Security Setup – User Security on the Restrictions tab. To the right of the Filter drop-down field, click the filter icon to create the filter.
If the employee should not be allowed to edit the filter, set Allow Edits by User to “No.”

You must save the filter for the filter to be available for user accounts. The filtering setup is the same as the filter page accessed via the employee toolbar. Once you have saved the filter, select the filter from the filter drop-down and save the user account.